|
|||||||
|
|||||||
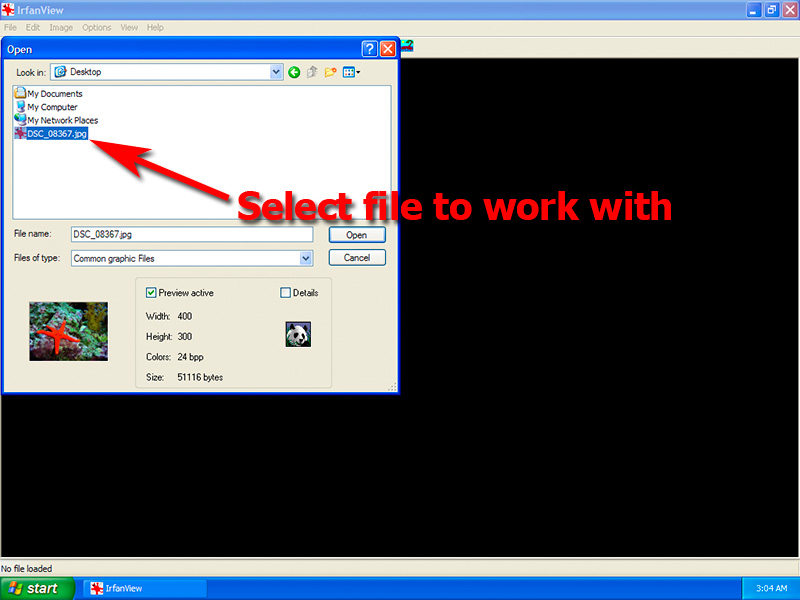
Reef Central Forums Now that we have taken some great shots, we want
to be able to show them off to the entire world. What better method
than to use internet forums. We will use reefcentral.com to post
our reef images, but these techniques apply to any forum. First, start out by resizing our image. We will accomplish this using IrfanView, a free image processing utility.
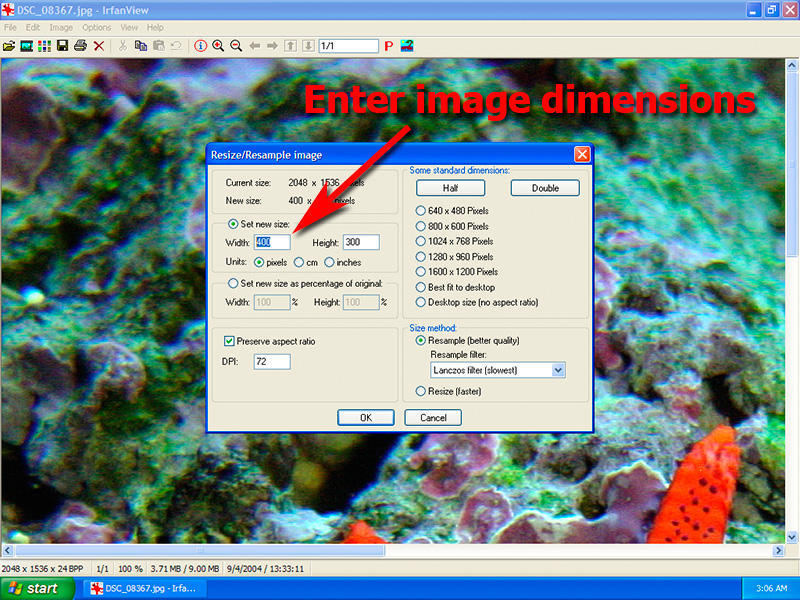
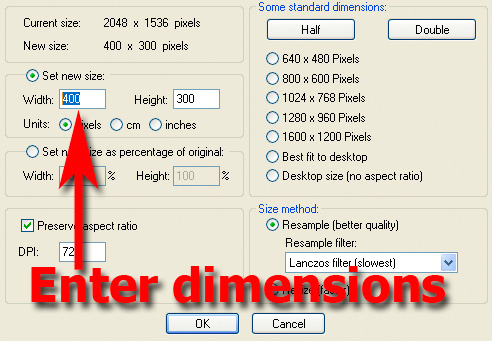
Alternatively, we could just drag our image onto the flat cat icon to have IrfanView automatically start up and load the image. The screen now shows our image loaded into IrfanView. Our 3mp camera produced a gigantic file with the dimensions of 2048x1536 pixels. This is too large to display at 100% on our screen so we only see a portion of it. We cannot post an image this large on a forum as it makes it difficult, not only for dial-up users, but users with screen sizes less than 2048x1546, as they will have to scroll around to see the entire image. A better size would be around 800 pixels wide at the longest dimension. 640 pixels wide is also a good choice. The larger the image, the more details will be seen. However, it will take longer for dial-up users to download these images, and they may simply abandon the post without looking at our images.
Now that the image has been resized, we can see the entire image in our window at 100%. This looks pretty good and will be the size that shows up in our post. You can make the image smaller or larger depending on your personal taste, but be sure to keep under the 50 KB limit unless you are hosting somewhere other than Reef Central.
We will call our file "starfish," since that is what it is. To get the file under 50Kb, we use 80% quality. You may need to use higher compression ratios for more detailed images and with less detailed images, you can decrease the compression to give you more quality. 80%, however, is a good starting point that generally works for most images.
|
|
|
|